Microscopes
SEEING IS BELIEVING
Light Microscopes
Microscopes that use visible light to view the microscopic world are broadly categorized as "light microscopes".
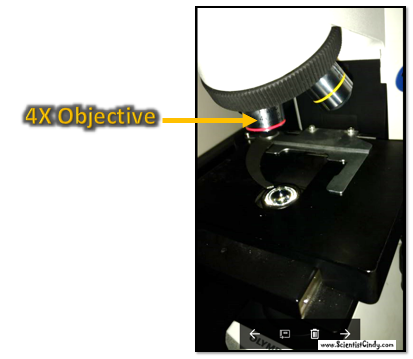
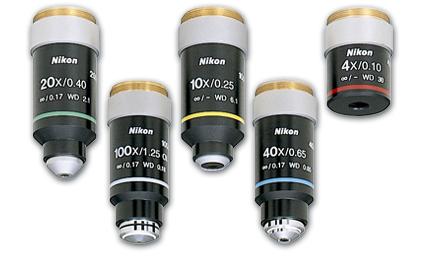
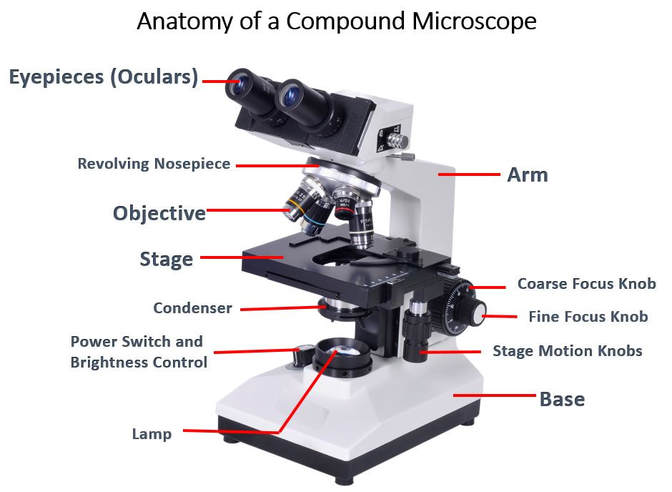
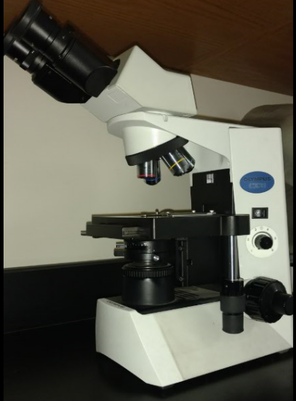
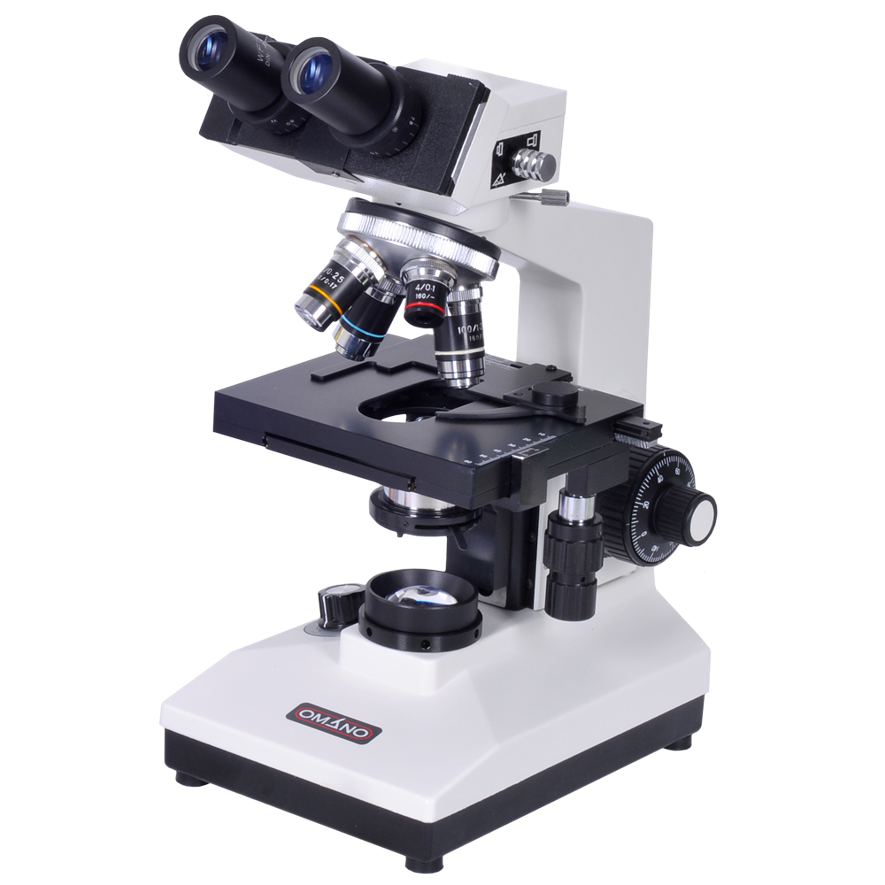
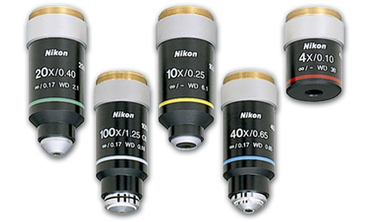
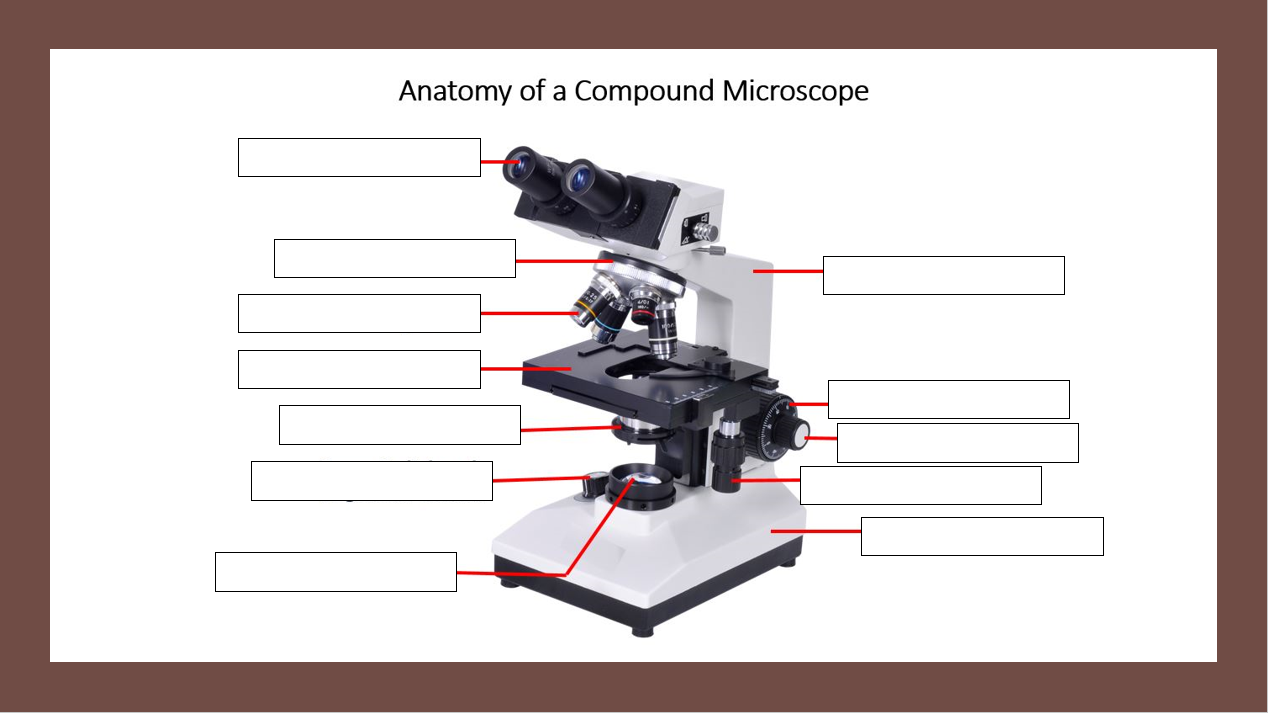
Compound Microscopes are a type of light microscope that uses a series of 2 lenses in order to achieve higher magnifying power than simple microscopes having only one lens (also known as "dissecting microscopes".) When using a compound microscope, specimen must be placed on a transparent microscope slide and covered with a transparent cover slip in order to view. The specimen is then placed on the stage of the microscope over the light source to allow light to pass through the specimen. The illuminated specimen is viewed through 2 magnifying lenses; 1) the magnifying lens of the objective located on the rotating nose-piece which is positioned directly over the specimen, and 2) the magnifying lens located in the eye-pieces. The eyepieces have a fixed magnification of 10X. The rotating nosepiece will have an array of objectives ranging from 4X up to perhaps 100X, depending on the microscope. Each objective is clearly marked indicating its magnification power.
|
|
|
Field of View
The field of view DECREASES as you INCREASE magnification.
The amount of light observed through the microscope gets dimmer (is reduced) as you increase magnification.
You should notice that your DEPTH OF FOCUS decreases as magnification INCREASES. This means that with a relatively small movement of the fine focus knob, you could be out of the focal range. For looking at cells, you will notice you will see fewer layers of cells at higher magnifications.
You can measure the actual length of your field of view by viewing a ruler or standardized grid with millimeter demarcations using the 10 X objective. count the number of mm in your field of view, then convert to micrometers. (1000um = 1mm).
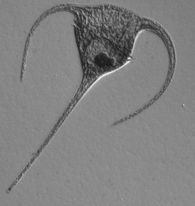
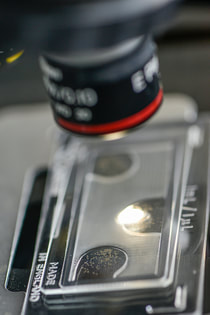
Inversion

|
You should notice that the image you see is UP-SIDE-DOWN and REVERSED. This phenomenon is called INVERSION.
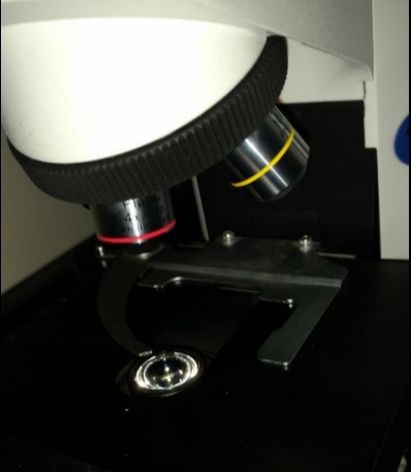
Due to INVERSION, when you move the slide to the RIGHT, the image of the slide that is seen through the oculars (or eye-pieces) appears to move LEFT. And, when you move the slide to the LEFT, the image of the slide that is seen through the oculars (or eye-pieces) appears to move RIGHT. This means the object will appear to move in the OPPOSITE direct as it is being moved in reality. Inversion is term used for the reversal of an image projected by a compound microscope. Compound microscopes have more that one magnifying lens. In most educational institutions, students use compound microscopes that contain 2 magnifying lenses. One of the magnifying lenses is called the OBJECTIVE. Typically, an array of objectives are screwed into the rotating nose-piece of the microscope, each having different magnifying power. The lowest power objective is the 4X objective, also called the "scanning" objective. This term is used, because the 4X objective should be used first, when viewing a new slide. The 4X objective have a wide field of view and a long focal length, which makes finding the specimen (or the area of interest) on the slide easier to find. There should also be a low powered objective that is a 10X objective and a high-powered objective that is 40X. Some microscopes may also have a 20X and / or 100X, etc. The second magnifying lense is not interchangeable and lies in the oculars themselves. The oculars will almost always have a magnifying power of 10X. A light source underneath the sample projects light upward through the sample and into an object lens. The objective lens is curved, thus causing the light that passes through it to cross over, thus inverting the image. The light then passes through the ocular lens, or the lens that you actually loo through with your eyes. Because the ocular lens is usually a simple lens, the inversion remains and you see the image inverted. |


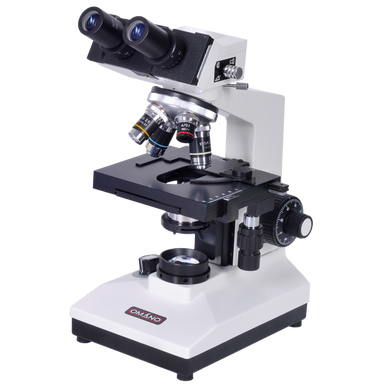
Introduction to the Compound Microscope
The compound microscope allows us to magnify objects up to 1000 times (with a 100X objective). We can calculate the magnification we are observing with the microscope by multiplying the magnification power of the objective, by the magnification power of the eyepieces. The magnification of the eyepieces is always 10X. There fore, If you are using the 40X objective, the object you are viewing under the microscope would be magnified 400 times more than with the naked eye. If we do the math, we see that 10X times 40X equals 400X. Compound microscopes are good for viewing up to 1 micrometer, or 100 nanometers (nm).
|
|
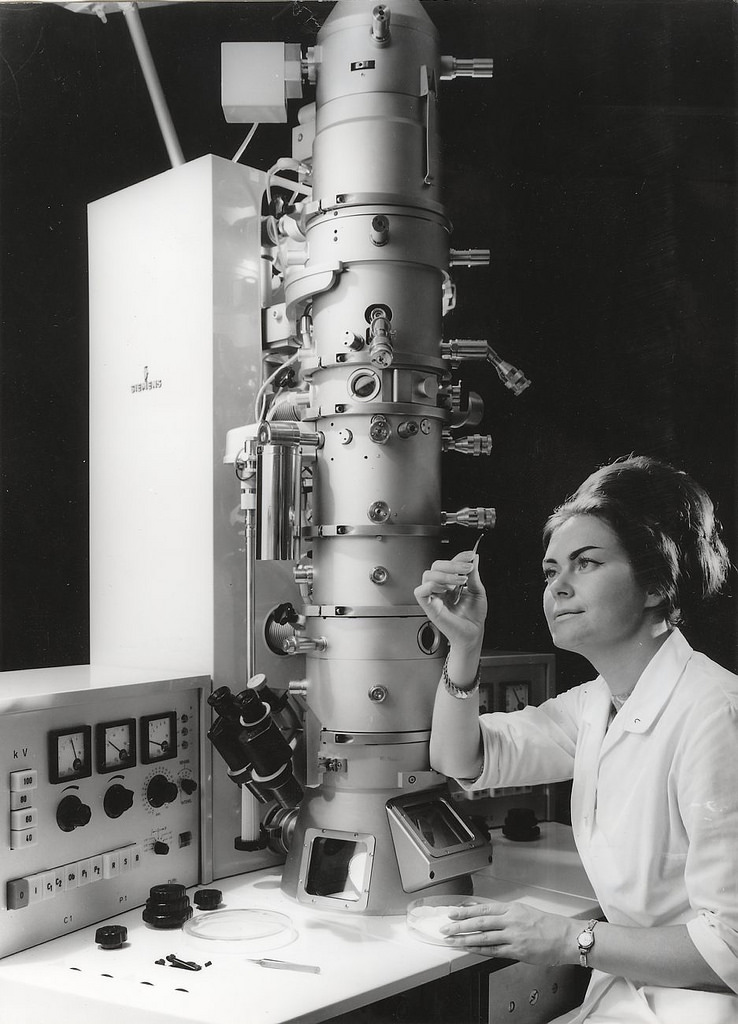
Physicist Ernst Ruska and electrical engineer Max Knoll constructed the first electron microscope in 1931.
|
(Side note about EM) In order to view even smaller objects, we would have to go to using a method that does not depend upon light. This is because the wavelength of visible light itself is only between 390 nm and 700 nm. At these small levels we can use electron microscopes since they utilize the wavelengths of electrons to visualize the specimen which are several orders of magnitude smaller than the wavelength of visible light. With electron microscopes we can visualize objects as small as 0.5 nm.
|
HOW TO USE THE COMPOUND MICROSCOPE
I. HANDLING
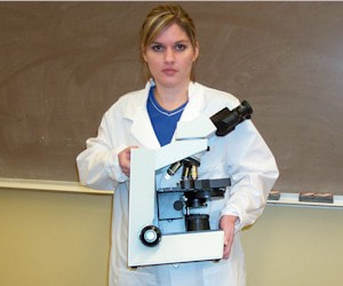
Before using the compound microscope, it is important to know how to handle and care for it. When transporting the microscope, it is very important to make sure that you have a good grip on the scope and carry it with 2 hands at all times. One hand should be placed on the base of the scope while the other should be placed on the body (see diagram). The scopes are not necessarily heavy, but their center of mass is at the base, making it unstable if supporting by one hand alone. You must also be sure that any cords are wrapped up and secured before supporting so as to not trip over the cord or create a hazard for others around you to possibly trip and fall.
Before using the compound microscope, it is important to know how to handle and care for it. When transporting the microscope, it is very important to make sure that you have a good grip on the scope and carry it with 2 hands at all times. One hand should be placed on the base of the scope while the other should be placed on the body (see diagram). The scopes are not necessarily heavy, but their center of mass is at the base, making it unstable if supporting by one hand alone. You must also be sure that any cords are wrapped up and secured before supporting so as to not trip over the cord or create a hazard for others around you to possibly trip and fall.
II. INSTRUCTIONS
Skipping or overlooking any steps could result in very costly damage to the objectives, eyepieces or other microscopic parts. Please take care to read instruction first, before doing each and every step.
|
|
1) Place microscope gently on the counter at your workstation.
2) Ensure that the scope is away from any edges so that it will not fall or get knocked over.
3) Plug in the microscope.
4) Locate the ON/OFF switch and turn the microscope ON.
5) Locate the LIGHT LEVEL adjustment and turn the light down so you do not hurt your eyes with bright light.
6) Use the COARSE FOCUS knob to move the stage all the way toward the bottom (base) of the scope (if it is not already there).
7) Once the stage is all the way down, you can safely rotate the NOSEPIECE to select different powered objectives.
8) Locate the 4X objective and make sure that that objective is pointing directly down toward the stage. (Failure to do steps 6, 7, and 8 in order can result in the objective hitting the stage, causing breakage!)
9) Once you have prepared your slide, you will place it on the STAGE, securing it between the two metal clips.
10) Locate the STAGE ADJUSTMENT/MOTION knob. Notice that this allows you to move the stage right and left and forward and back. You should try to center the specimen on your slide over the light source with the naked eye using the STAGE ADJUSTMENT knob. |

|
IV. INCREASING MAGNIFICATION
|
Only after performing all of the steps (1-14) first and in order, do you want to proceed with the instructions here.
|
Can You Identify These Parts of The Microscope?
PUTTING AWAY SCOPES
1) Turn off POWER switch.
2) Make sure the stage is all the way toward the bottom (toward the base).
3) Make sure that the 4X objective is pointing down toward the stage.
4) Wrap up and Secure Cord.
5) Carry with 2 hands; one on the base and the other on the body.
6) Be aware of your surrounding and carefully place the scope in the proper place.
7) Make sure you area is left clean.
PARFOCAL
--- Microscopes have a special property, called "being PARFOCAL" which means that once the object is focus and centered using the 4X, when you switch to the next highest objective, your specimen will be relatively centered and in focus. You should only have to make MINOR adjustments to the FINE FOCUS and the STAGE POSITION, in order to view your object at the higher objective. If you have difficulty, you must go back to 4X and recenter and refocus!
--- Microscopes have a special property, called "being PARFOCAL" which means that once the object is focus and centered using the 4X, when you switch to the next highest objective, your specimen will be relatively centered and in focus. You should only have to make MINOR adjustments to the FINE FOCUS and the STAGE POSITION, in order to view your object at the higher objective. If you have difficulty, you must go back to 4X and recenter and refocus!
Field of View
The field of view DECREASES as you INCREASE magnification.
The amount of light observed through the microscope gets dimmer (is reduced) as you increase magnification.
You should notice that the image you see is UP-SIDE-DOWN and REVERSED (the is INVERSION).
This means the object will appear to move in the OPPOSITE direct as it is being moved in reality.
You should notice that your DEPTH OF FOCUS decreases as magnification INCREASES. This means that with a relatively small movement of the fine focus knob, you could be out of the focal range. For looking at cells, you will notice you will see fewer layers of cells at higher magnifications.
You can measure the actual length of your field of view by viewing a ruler or standardized grid with millimeter demarcations using the 10 X objective. count the number of mm in your field of view, then convert to micrometers. (1000um = 1mm).
|
|
Dark-field microscopy is used for observing objects that have low contrast.
Only light rays scattered by specimen enter objective lens. Specimen appears light against dark background. Increases contrast and enables observation of more details. 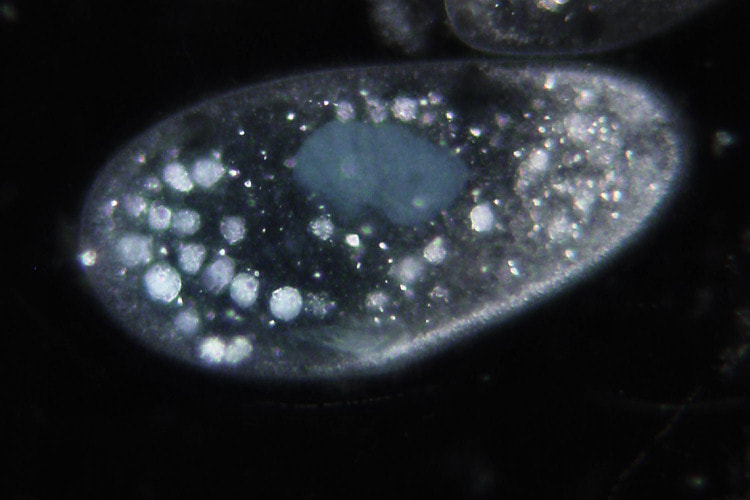
Image courtesy of https://group1micropara.weebly.com/microscope/dark-field-microscopy
|